

The first time you’re able to take out a telescope and start exploring the night sky it can seem overwhelming where to start, even with one as easy to use Astroscan® Millennium. For those new to astronomy and using an Astroscan® Millennium my advice is always to start by using red-dot finder, point it at the object in the night sky you would like to start viewing. From there you are then able to look through the eyepiece, adjust the focus, and see an enlarged version of the object. But what happens when you look through the eyepiece and don’t see what you were looking for? Don’t worry your new telescope isn’t broken and the main reason for this is an alignment issue with the red-dot finder, something that’s easily corrected using the red-dot finders adjustment knobs. 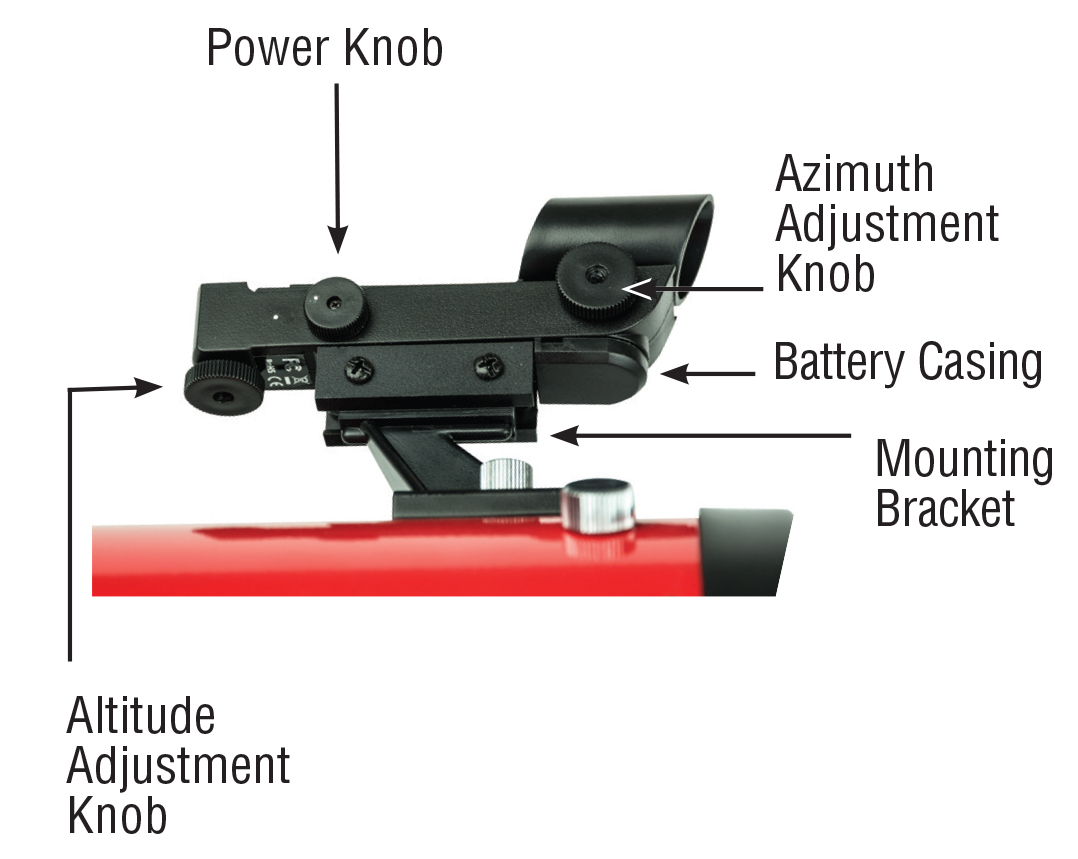 There are 3 knobs on the red dot finder, the power knob (marked with a white dot) turns the red dot on and off. The other two are adjustment knobs, one knob is for azimuth adjustments and the other is for altitude adjustments. These adjustment knobs are used to center the red dot on the same object that the telescopes is centered on. I know what many of you are already wondering, what is azimuth and altitude? In the most simple and basic terms, the azimuth knob will adjust the red-dot finder east and west in the sky and the altitude knob makes adjustments north and south.
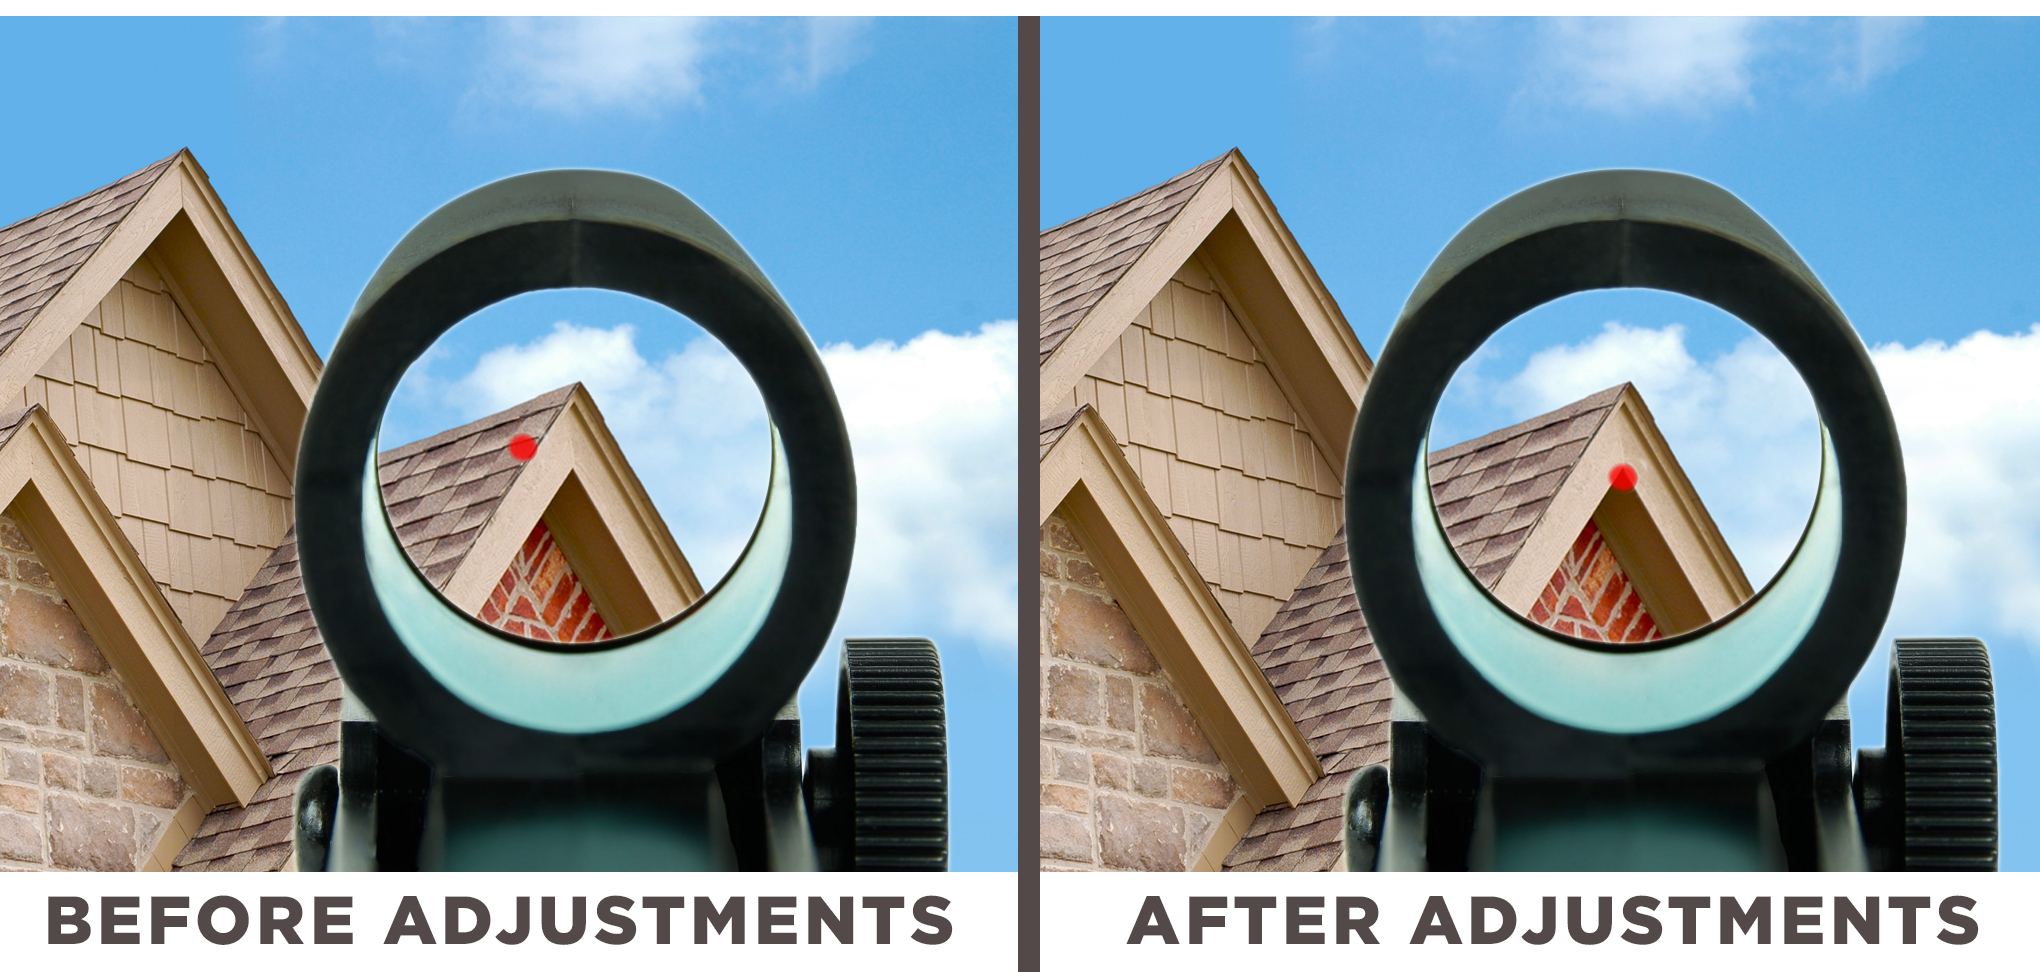
Using the Astroscan® Millennium for the first time will require the red-dot finder to be adjusted and my suggestion to someone making these adjustments as a first timer is to do them just after sunset, before it is dark enough for stars to be seen, but you are able to see the red dot inside the finder. Start by finding an object that is both large and easy to identify such as the peak of a roof or telephone pole. Then point your Astroscan® Millennium at the object and locate it while looking through your 17mm eyepiece. (Remember that because the Astroscan® Millennium uses a parabolic mirror the image you see in your eyepiece will be upside down) Once you have centered your object in the eyepiece then its time to use the azimuth and altitude adjustment knobs so the red dot is centered on the object you saw when looking through the eyepiece
I feel it is easier for a someone new to astronomy to align their red-dot finder at dusk, this way when the user can have a frame of reference at what they are looking at (like the a rooftop) to know which way then need to move the telescope versus doing it across the blackness of space. While many will say (including me!) to use the moon for this as it is the largest and brightest object in the night sky, depending on the time of the month moon rise could be after Midnight and later then you might want to be stargazing with younger kids.
When you’re using the 10mm eyepiece to find an object like Saturn with the Astroscan® Millennium requires the red-dot finder to be as exact as possible. What looks like only a small adjustment through the red-dot finder will be off by millions of miles in space.
PS: Remember to turn off the red-dot finder when you’re not using it to save the battery The battery will only last about 48 hours if left on as I may or may-not of found out already!